Tutorial: Record an FBX animation
In this tutorial, we will see how to record and export a FBX animation from an INTERACT scene. As you can easily create kinematics of your equipment with Interact, it may be useful to use this kinematics animation for other purpose in a empty Unity project or any FBX viewer to build application for mobile devices for instance.
Import the Unity Recorder package
Open the Package Manager and add the package named com.unity.recorder.
Set a FBX recorder
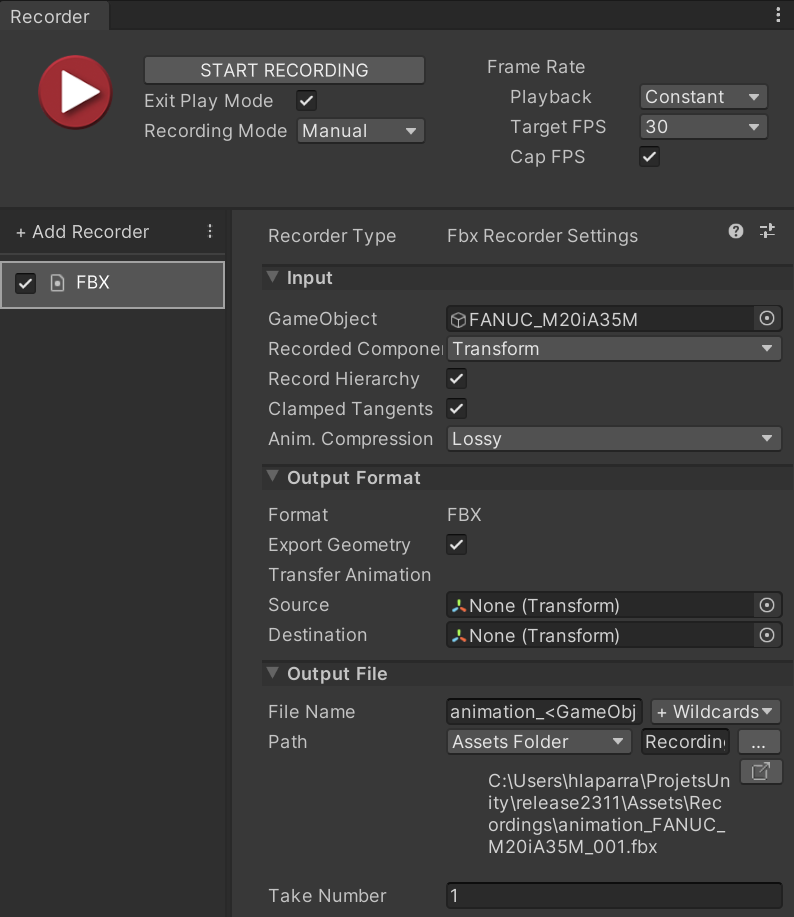
- Use the toolbar menu Window > General > Recorder > Recorder Window.
- Click on + Add Recorder
- Select FBX
- In Fbx Recorder Settings, select the root node of the object to record under GameObject field property.
In this tutorial, we will use a robot from the Interact's library, which comes already physicalized in Interact > Industrial Library > Robots > FANUC > M 20iA-35M

Record
- Launch INTERACT Simulation.
- Start Recording once ready.
- Manipulate your rigid bodies.
- Stop Recording
Export
- By default your .fbx record is exported in your Unity project folder under ./Assets/Recordings/
- You can now open it in a blank Unity project or any FBX viewer.
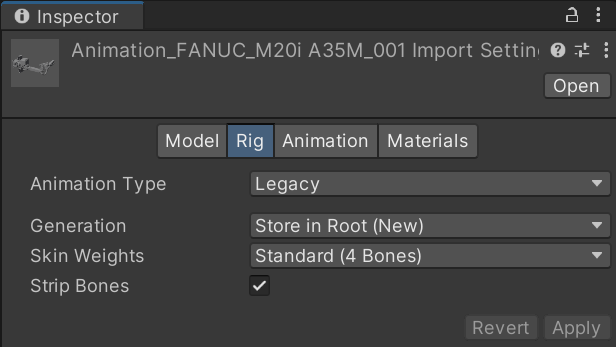
- In Unity, make sure to set the correct Rig Import Settings with Animation Type to Legacy to use the recorded animation of your FBX.
