How to customize VR Menu
VR Menu is a set of runtime tools that can be accessed while playing a simulation in virtual reality. You can remove unneeded functions or add custom functions to it for your simulation.
The following example will show you how to add a new tool to the VR Menu. We will add an headlight tool on our player helmet, that can be switch on or off from the VRMenu.
Create the headlight tool
-
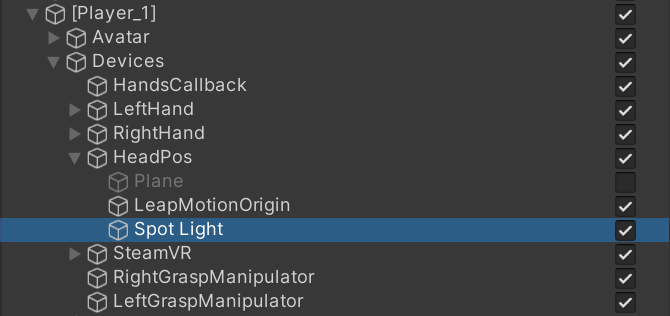
Add a Light component in [Player_1]/Devices/HeadPos

-
Set the Unity Light component as a spotlight
-
Set the light transform to fit on the avatar helmet:
Transform Position (x = 0, y = 0.05, z=0) Rotation (x = 15, y = 0, z = 0) -
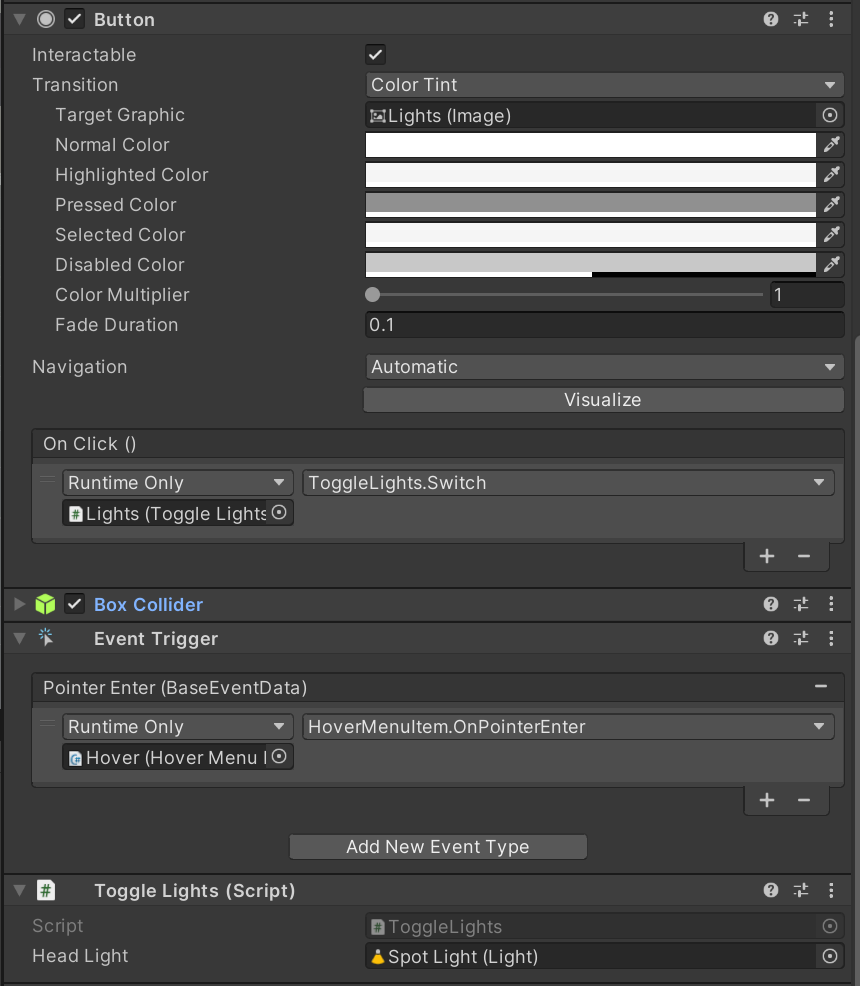
Create a custom script to switch this light on/off and add it to the light GameObject.
public class ToggleLights : MonoBehaviour
{
    public Light headLight;
    public void Switch()
    {
        if (headLight.enabled)
        {
            headLight.enabled = false;
        }
        else
        {
            headLight.enabled = true;
        }
    }
}
Customize VR Menu to switch headlight
-
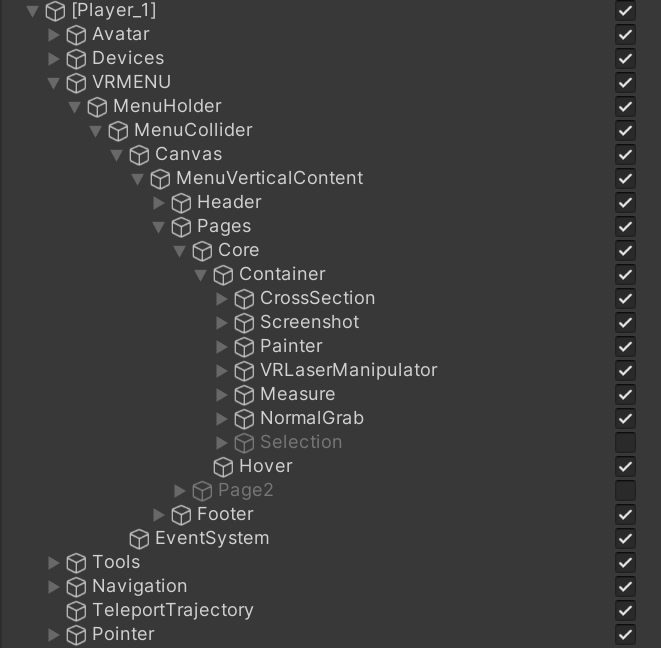
Go to [Player_1]/VRMENU/MenuHolder/MenuCollider/Canvas/MenuVerticalContent/Pages/Core/Container/

-
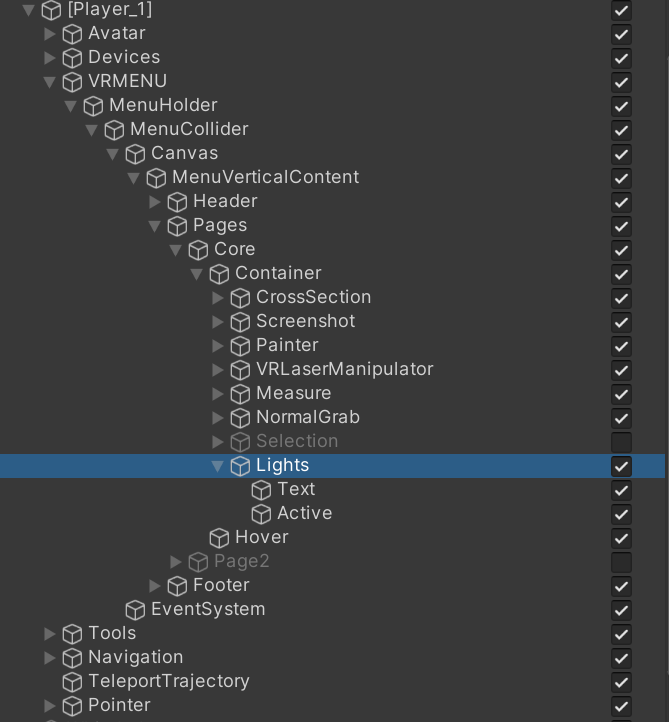
Duplicate one of the existing feature gameobject (CrossSection, Painter, Measure, etc) and rename the new gameobject as Lights.

-
In the Image component change the Source Image to edit the button image.
- In its children gameobject Text you can edit the button text.
- Remove the VRMenuItem script from your newly created gameobject.
-
In Button>OnClick() add your custom script and select the desired function that will be triggered by the click event.
