Interact for CAVE
A CAVE, which stands for Cave Automatic Virtual Environment, is a type of virtual reality environment that uses multiple projection screens to create a 3D immersive experience for the user. The screens display images which are synchronized with the user's movements to create the illusion of being inside a virtual world. CAVE systems are often used in scientific research, engineering, and other fields where it is important to have a highly immersive and interactive VR experience.
License
In order to use CAVE capabilities in Interact, you must acquire an Interact CAVE license. Contact our sales team to learn more about this.
CAVE configuration
You will need a configuration file describing all CAVE settings: number of screens, size, resolution and network settings will be saved into this file.
This file has the .xvm extension and is an XML file.
CAVE configuration file
Contact us to generate your CAVE configuration file.
CAVE usage
If your CAVE has a cluster, you need to launch an utility to monitor, copy and launch your executables across all computers. This utility is called Interact's daemon. Start this commandline executable and all replica's computers.
Play on startup
you can setup Interact's daemon to run automatically on startup. See Microsoft Windows documentation for more infos.
In your application, create a new simulation, and a new player. 1. Interact > Create new simulation 2. Add player > Select CAVE
You will be asked to select a configuration file that will describe your CAVE configuration - number of screens, size, network configuration ...
- Select the .xvm file of your CAVE.
- Build your application. Interact > Build application and select a folder shared by all cluster nodes as a build destination folder Building the application is necessary to have the same application on all computers.
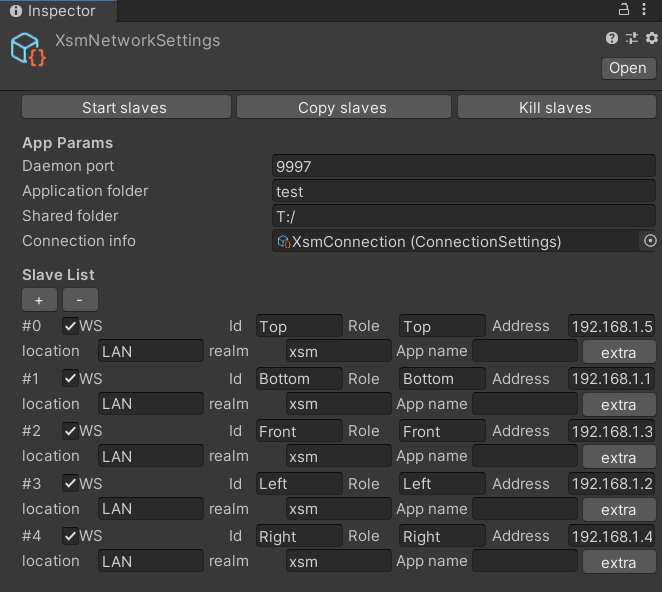
- In Resources > XsmNetworkSettings, configure the Shared and Application folders and click on Copy slaves to copy the built application on all computers.
- Click on Start slaves to launch application on all cluster computers.
- On the master computer, click play on your editor. Your application should start and every screens should now be synchronized.

Methodology for developing CAVE applications
The master computer will act as a centralized node hosting the simulation and sharing the object movements and behaviors to the slave nodes. There are several ways to synchronize object movements across all cluster nodes.
Physicalized objects
By default, all physicalized objects will automatically be shared and synchronized on your cluster. Indeed, physics simulation will only be run on the master computer, and results will be shared on secondary computers.
XdeNetworkTransform
If you want to share Transform of a object between all cluster machines, you can add the component XdeNetworktransform. This is only needed for non-physicalized GameObjects.
Position and rotation will be copied from the master computer to the secondary computers.
Unity animation
In order to execute an Unity animation in your cluster, you can add a XdeNetworkTransform to an object having a standard Animator component. Then, add an XdeNetworkCuller and set the animator as the target component. Thus, when your simulation starts on the master, Animator component will be kept alive and positions will be shared thanks to XdeNetworkTransform component. On secondary nodes, Animator will be deleted and position will be retrieved thanks to XdeNetworkTransform component.
XdeNetworkCuller
If you need to execute a component only on some nodes, you can use the XdeNetworkCuller component to do so. It will disable a specific behaviour (or the whole object) when your simulation start. This is generally used when you want to execute a behavior only on master computer.

- Target component: If none, the whole GameObject will be culled when the simulation start. If a component is set, only this component will be deleted.
- Rule and Filter: Will only keep object if this condition is true. Role or ID are defined in XsmNetworkSettings parameters.
XdeNetworkCuller and physicalized objects
Do not use a culler object on physicalized objects. Physicalized objects will already be handled automatically.
Move player
In order to move your player to navigate in the scene, you can move the [Player_1] transform by script or using an animation.